
Have you been looking for a way to screen record on your dell laptop? Maybe you want to record a video of yourself working through something, or you want to show a friend or a family member how to do a specific task on their laptop. Or maybe you want to create a tutorial for your YouTube channel or record a video to illustrate something for your students. If you want to learn how to record a video on Dell laptop, read on.
We have all been in a pickle at one point in life, trying to find the best way to take a video on our dell laptops but not knowing how to proceed. Well, you won’t have to worry about it anymore. We’re about to walk you through the three ultimate ways to screen record on dell laptop. We love all three different screen recording methods, but our top favorite has to be the first one: using the Windows Game Bar Recorder.
1. Windows Game Bar Recorder

Few know how straightforward the process of screen recording can be. The software Windows Game Bar Recorder is software that already exists on every dell laptop, which is why this is our favorite application.
Most people go crazy over this software, especially the upcoming generation. The reason for that is that this application is most often used to record video games. You can even change settings to control the speakers, the microphone, quality, and numerous other things. So, if you’re wondering whether you can screen record on a dell laptop, the short answer is yes, you most certainly can.
NOTE: Not all Windows 10 will work with this software.
To find out how to record a video on a Dell laptop using Windows Game Bar Recorder, read through the following steps:
Step 1: Adjust Settings to Screen Record on Your Dell Laptop
You need to make sure all your settings are enabled. This includes audio, video, and screen recording permissions. Otherwise, you might risk the chance of recording everything without any sound on.
To enable all these options, you should check your windows taskbar and go to the settings from there. You will find the settings button on your Dell laptop screen.
Step 2: Open Your Desired Screen
The very first step is opening the screen you want to record. That way, you can immediately start recording your desired screen instead of opening it up once the recording begins.
Step 3: Start Recording
To start recording, you can press the video recorder button, the red circular one. To open the Windows Game Bar Recorder, you can press Windows + G to prompt the whole software to open. Otherwise, if you want to start recording immediately, you can press Windows + Alt + R. If you choose to proceed with the first method, you will find the below icons pop up.

Step 4: Stop Recording
Once you are done with your task, you either press the video recorder again or press Windows + Alt + R once again.
The software will save your video recording as an MP4 file (.mp4). To find your video recording on your Dell laptop, go to Video > Captures.
2. Wondershare DemoCreator
This software is a downloadable one, as is called the Wondershare DemoCreator. This software is one of the most commonly used in the tech world due to its incredible features. There is a free and purchased version of it, and it is such a beautifully constructed video recording software. However, we do recommend buying it to access all its different features.
Step 1: Adjust Settings to Screen Record on Your Dell Laptop
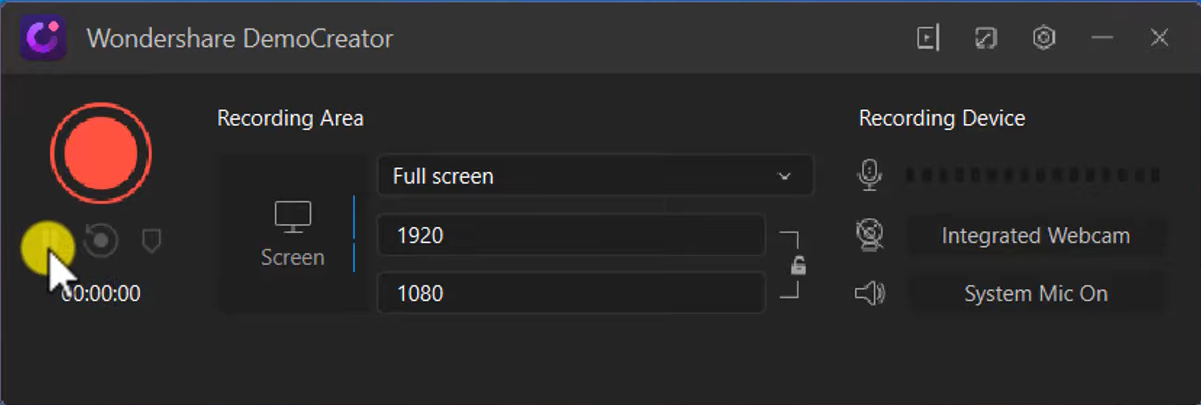
To learn how to screen record on Dell computer, the very first thing you have to do is open up the application. Once you have Wondersahre DemoCreator to record your screen on your dell laptop, you will be prompted with two options. Choose the “New Recording” option to start the recording process.
Now, as you can see in the image above, you have the option to pause, delete, fix the screen size, and select the area you want to be recorded. Don’t forget to change your microphone settings, integrate your webcam if you want your face to show in the recordings, and fix the sound settings. You can also edit the place you wish to show afterward, so you won’t have to worry about it too much.
Step 2: Start Recording
After fixing up all your settings, you need to press the red button to record your screen.
Step 3: Edit Video
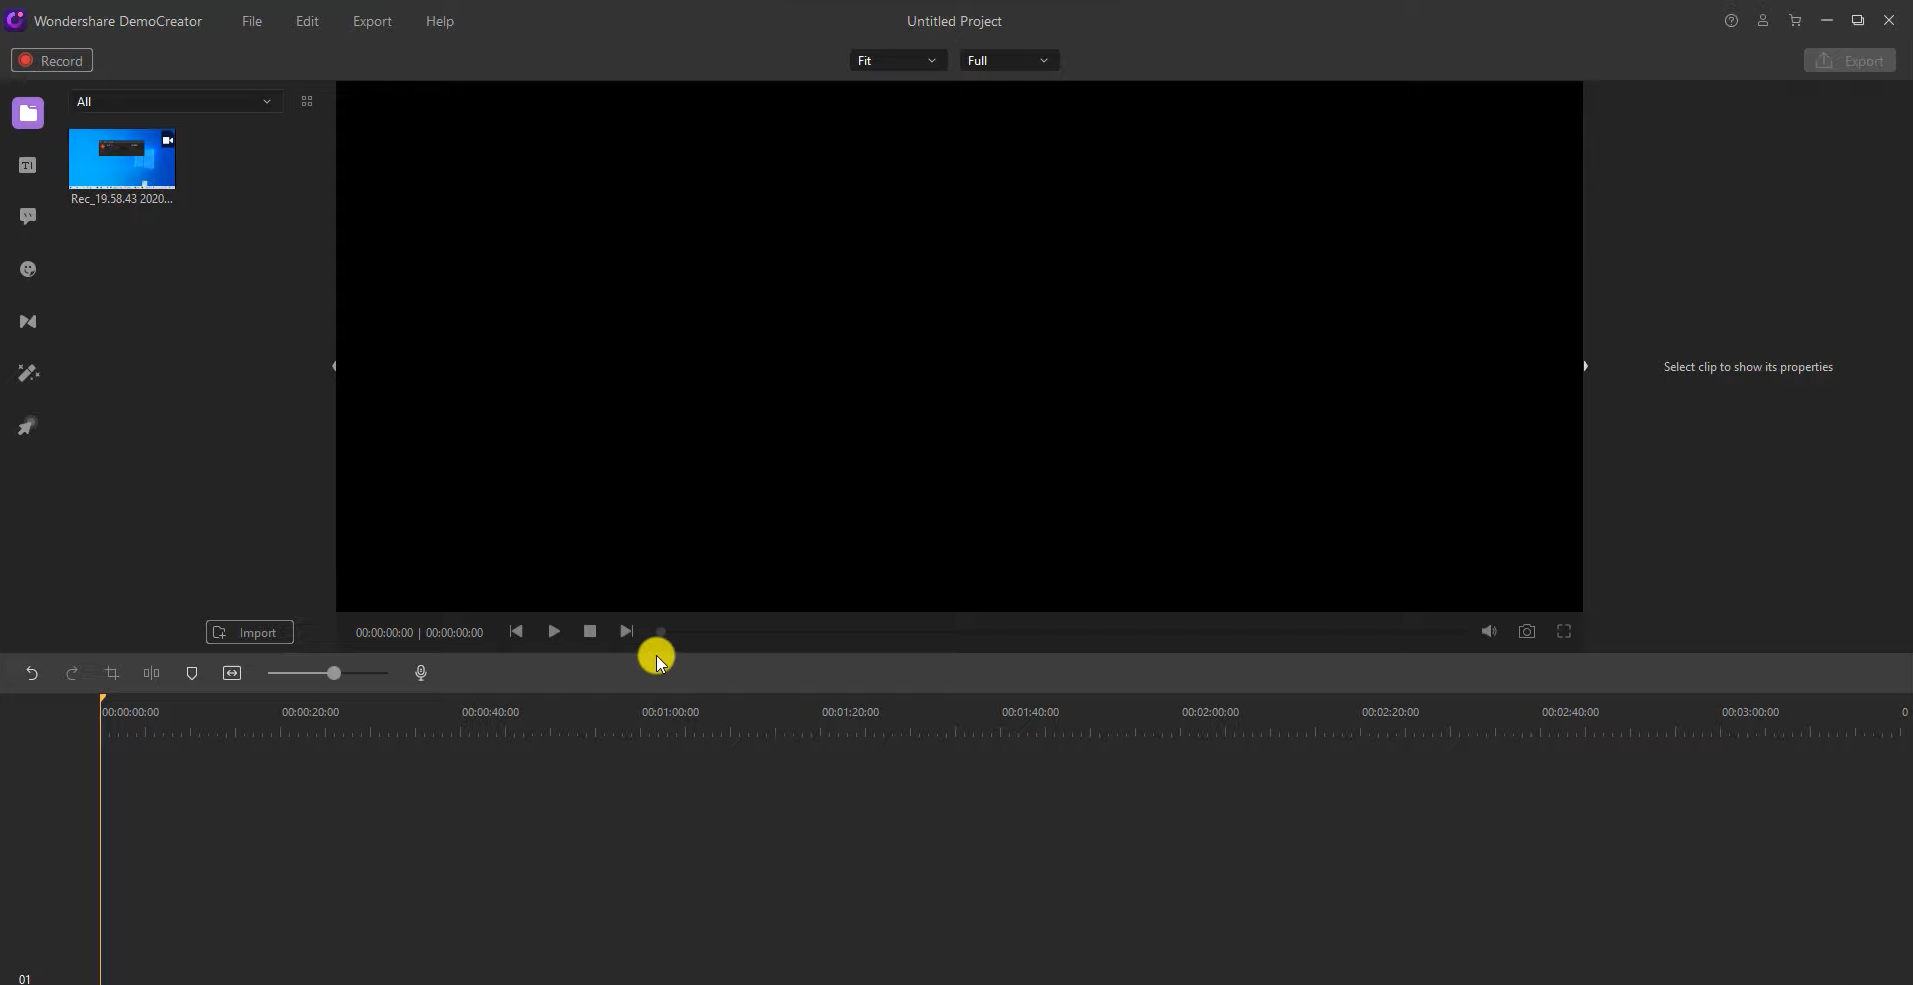
One of the most remarkable features of Wondersahre DemoCreator is the editing features provided after recording your video. You can use stickers, add images, change lighting, edit, crop, and use multiple other editing tools to enhance your video.
Step 4: Save and Share
Another fantastic feature is that you can immediately share your screen recording on multiple platforms, including social media. However, if you want to save your video, you will be able to do so in numerous formats.
3. OBS Studio
We still have a third software for you. Gamers and online teachers alike often use OBS Studio due to its numerous features and a wide variety of functions. It is well-known due to its simplicity and ability to enable you to transition between screens and tabs smoothly.
Step 1: Download OBS Studio to Screen Record on Your Dell Laptop
The first step is pretty obvious, as you need the software present on your laptop. Download and install the software. Then you’re ready to proceed.
Step 2: Setup the Features
While you’re going through the initial processes to set up the software, the software will prompt you with the following:
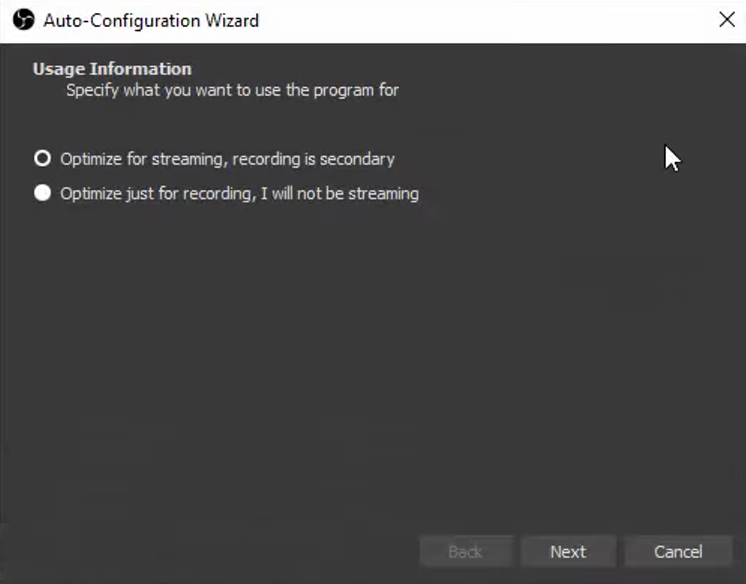
Innumerable streamers online use this software to stream their games on YouTube and other platforms while they’re playing. However, for the sake of simply screen recording, press the “Optimize just for recording, I will not be streaming” button.
Afterward, you will see a screen with numerous tabs above. You have the luxury of changing the settings according to your liking and purpose. Moreover, you can add images, audio sounds, visuals, and much more. You can also adjust your display settings to fix the resolution according to what your laptop supports.
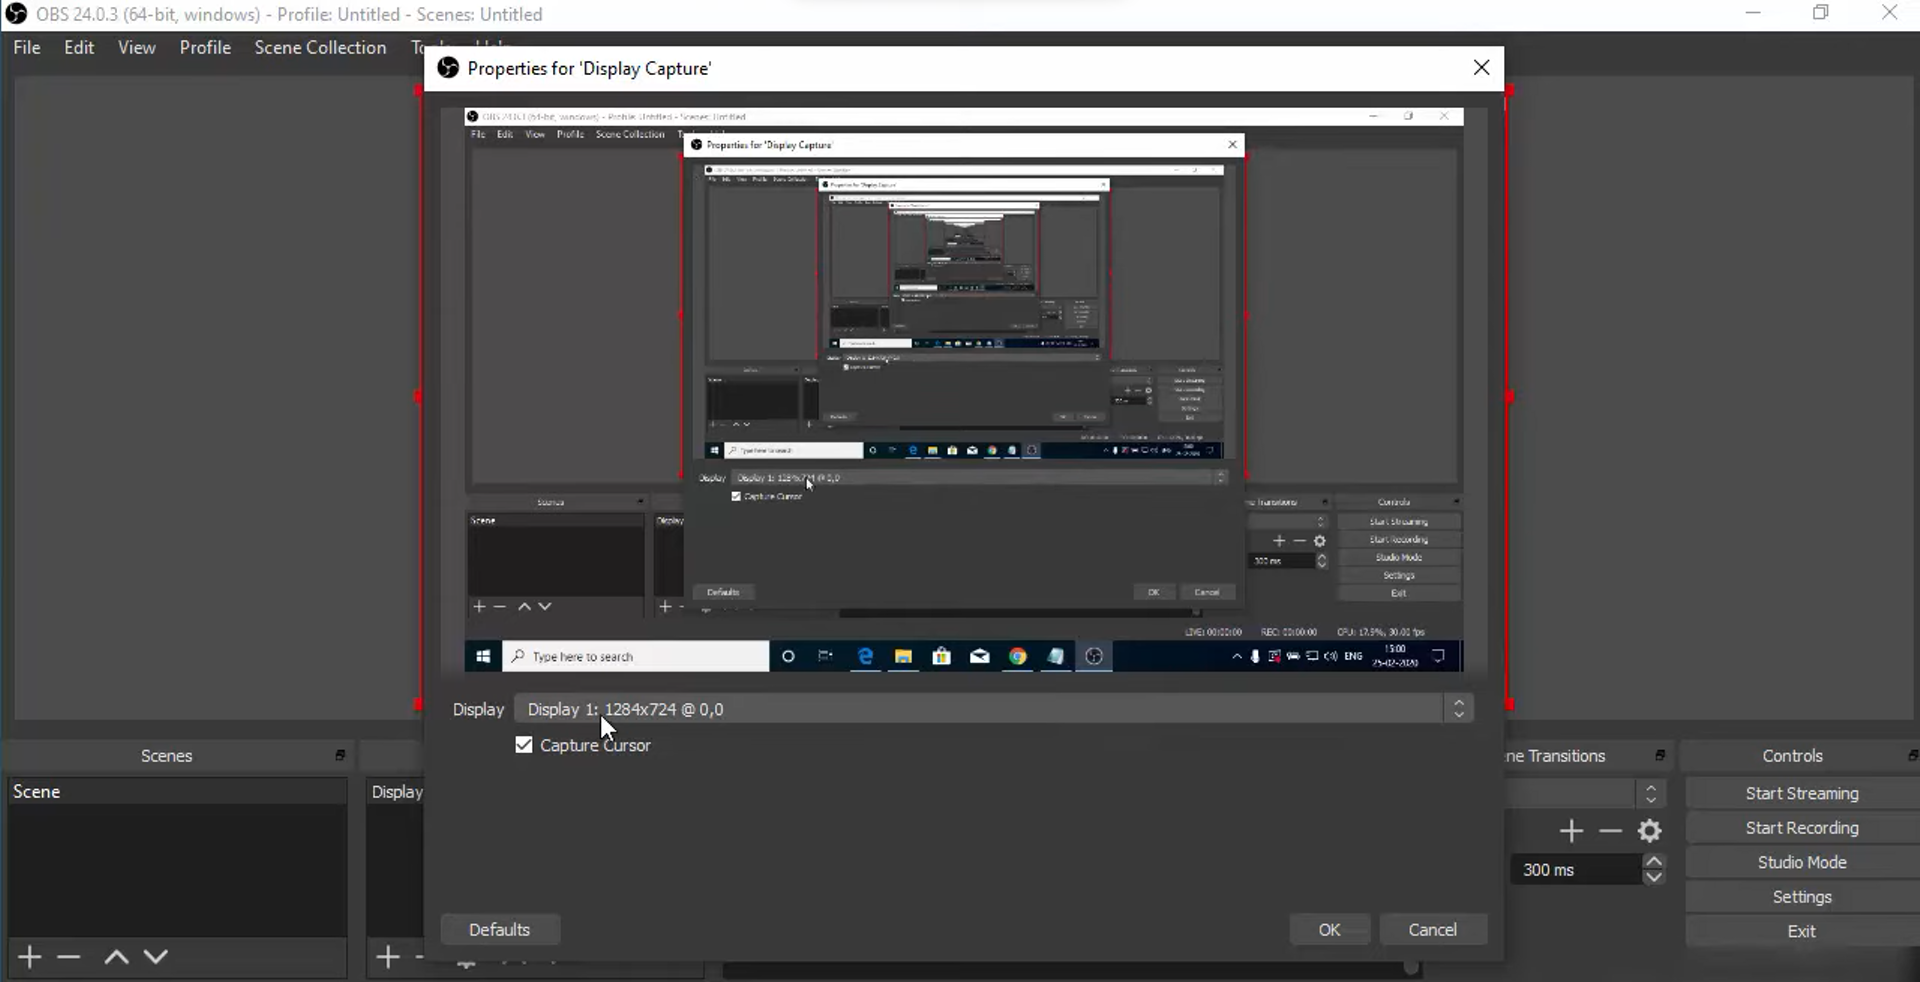
Step 3: Start Recording
At the bottom right, you can notice the Start Recording button. Once you proceed with your screen recording on Dell laptop, press that button. Once you want to stop recording, press the same button. The software automatically saves your file as an MP4 file once you’re done.
Conclusion
If you want to learn how to record a video on a dell laptop, we provided you with three different methods above. Now, choosing the right one will depend on numerous things. First of all, why do you want to screen record? Secondly, do you want to edit your video easily afterward? Once you answer these questions, decide whether you are willing to purchase software that will allow you to edit your videos with numerous features or you want straightforward software.
In our opinion, using the Windows Game Bar Recorder is the most convenient, straightforward way of recording your screen on a dell laptop. However, if you want to enable editing, opt for the Wondershare DemoCreator. Otherwise, if you want a more sophisticated, high-resolution software, the OBS Studio has been around for so long that everyone in the tech world has heard of it, and most still use it.